Simplesaml setup
- Make sure that mod_ssl is installed on the E6 server.
- Make sure that there is an SSL certificate installed on the E6 server that matches the DNS name that it going to be used for the SAML implementation (so if using "saml.napc.com" then there needs to be an SSL certificate that specifies either that exact name or a wildcard cert that specifies "*.napc.com").
- Install Apache SSO module on the WNS Server per instructions
- Configure your Apache server or Apache Virtual Host so that the DocumentRoot points at the folder containing your E6 installation, like so: DocumentRoot /var/www/html/elegant6
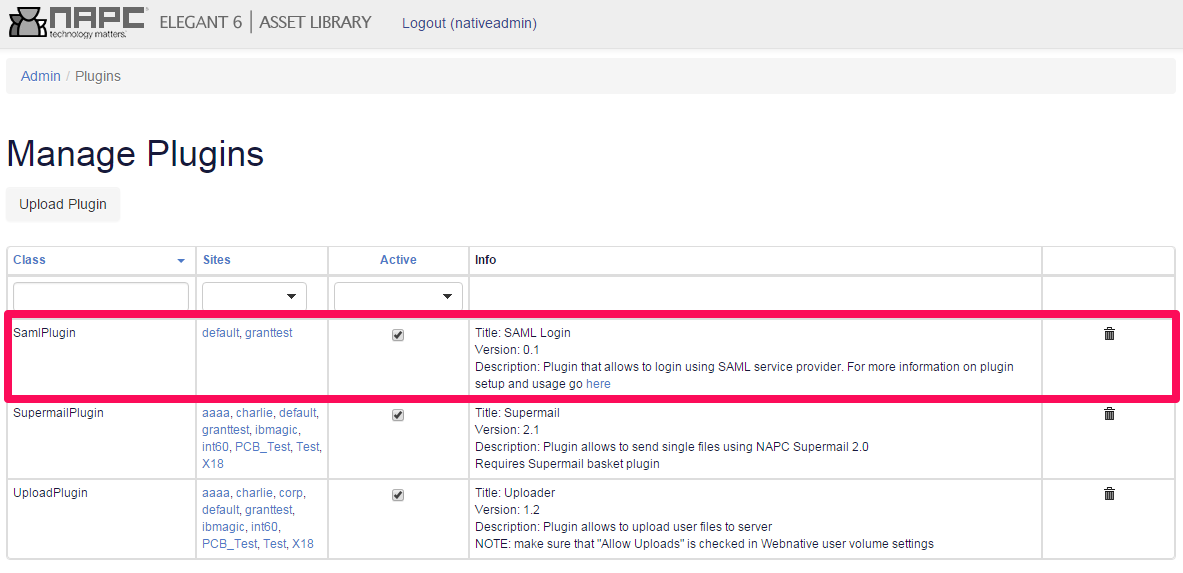
- Obtain SAML plugin from NAPC.
- Install it in your Elegant 6 application (more info)
- Create “saml.conf” file with the following contents:
Alias /simplesaml /var/www/html/elegant6/framework/simplesamlphp-sp-5-2/www
NOTE: replace “/var/www/html/elegant6” part if your Elegant 6 destination folder is different.
- Place config file in one of the following directories:
a. /usr/napc/conf/apache
b. /etc/httpd/conf.d
-
Restart apache:
apachectl graceful
Centrify setup
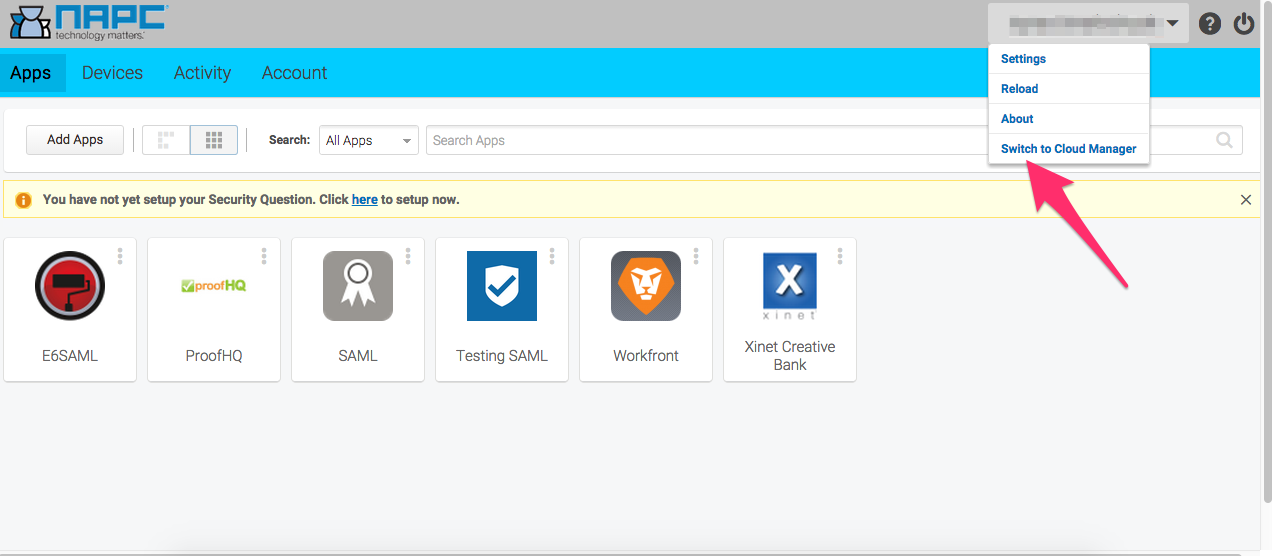
- Login to your Centrify account and choose Switch to Cloud Manager (make sure you have the rights to create applications)
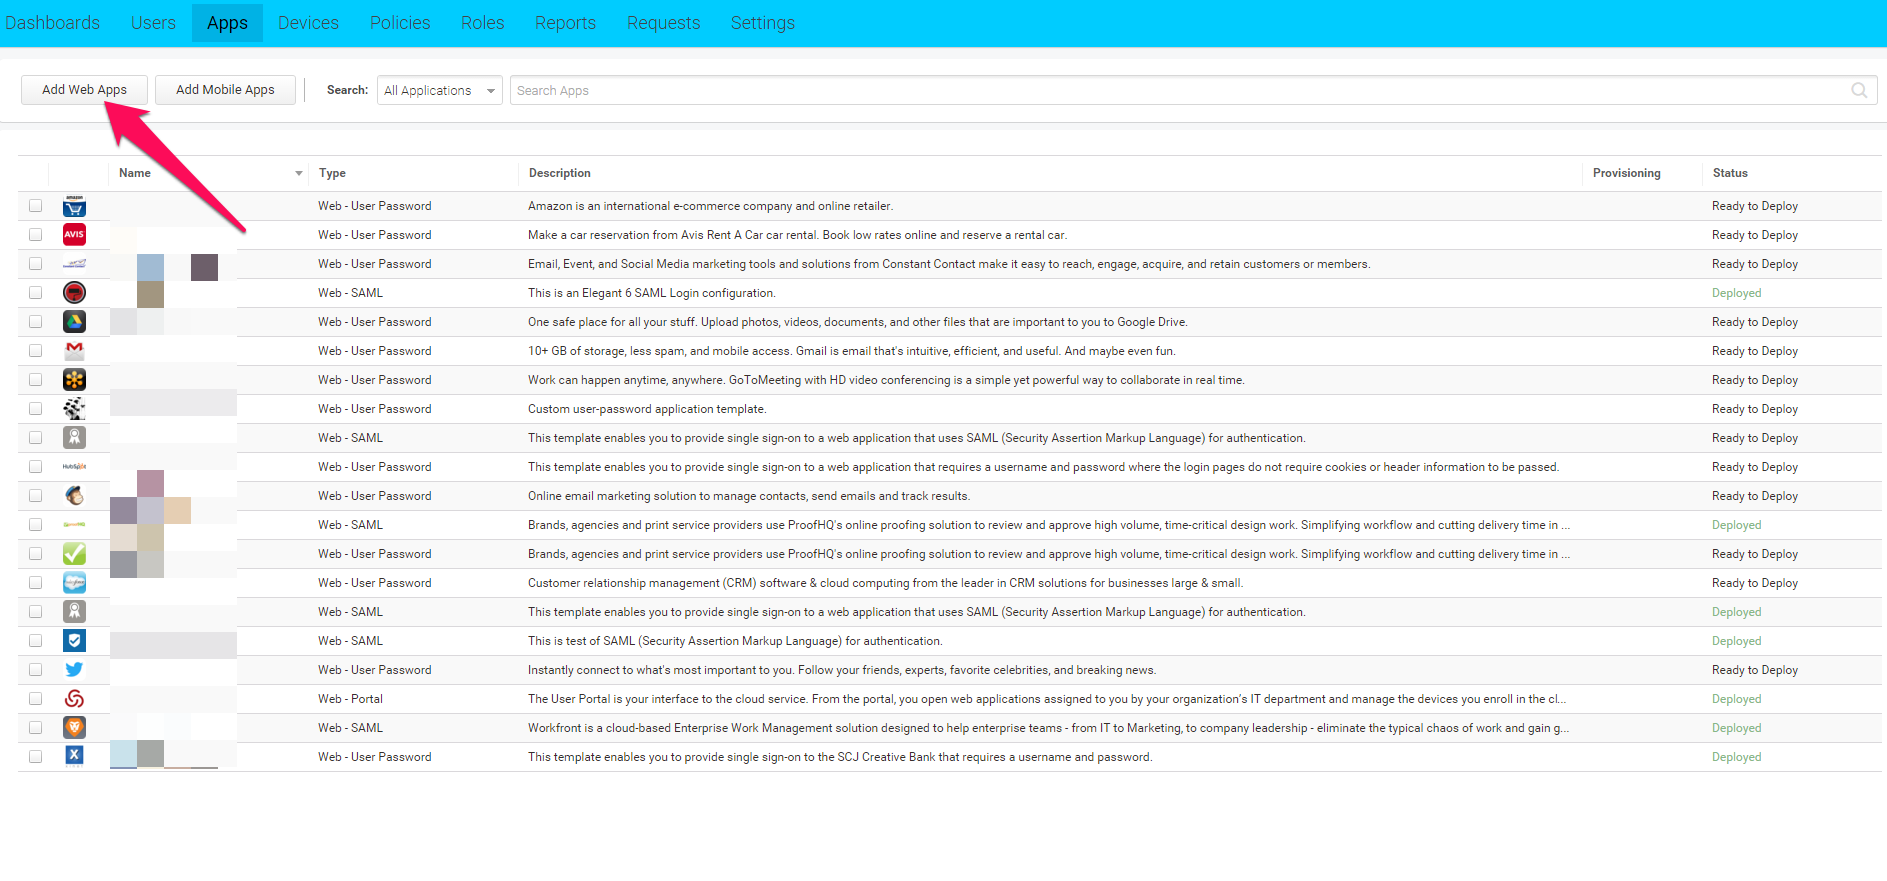
- Go to “Apps” page and click “Add Web Apps” button
- Select “Custom” and pick “SAML” application
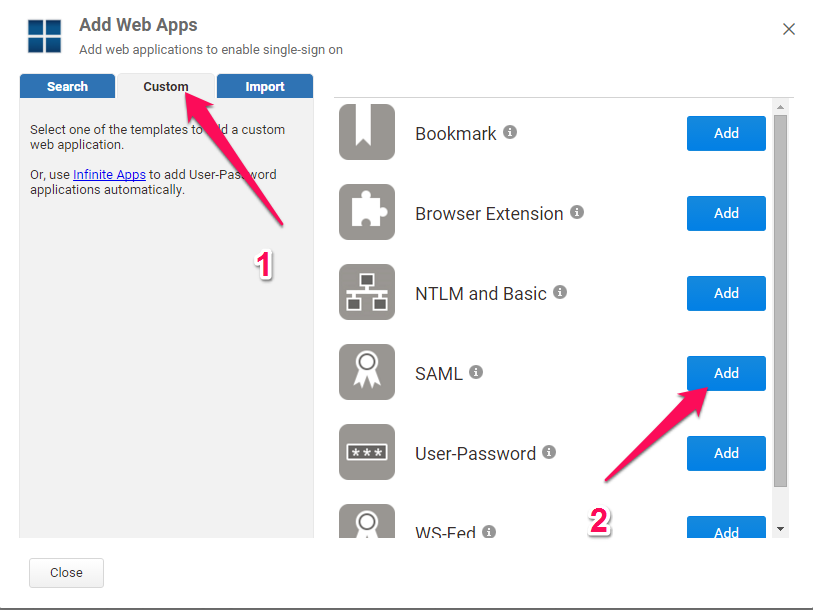
- Click “Yes” in the next popup dialog

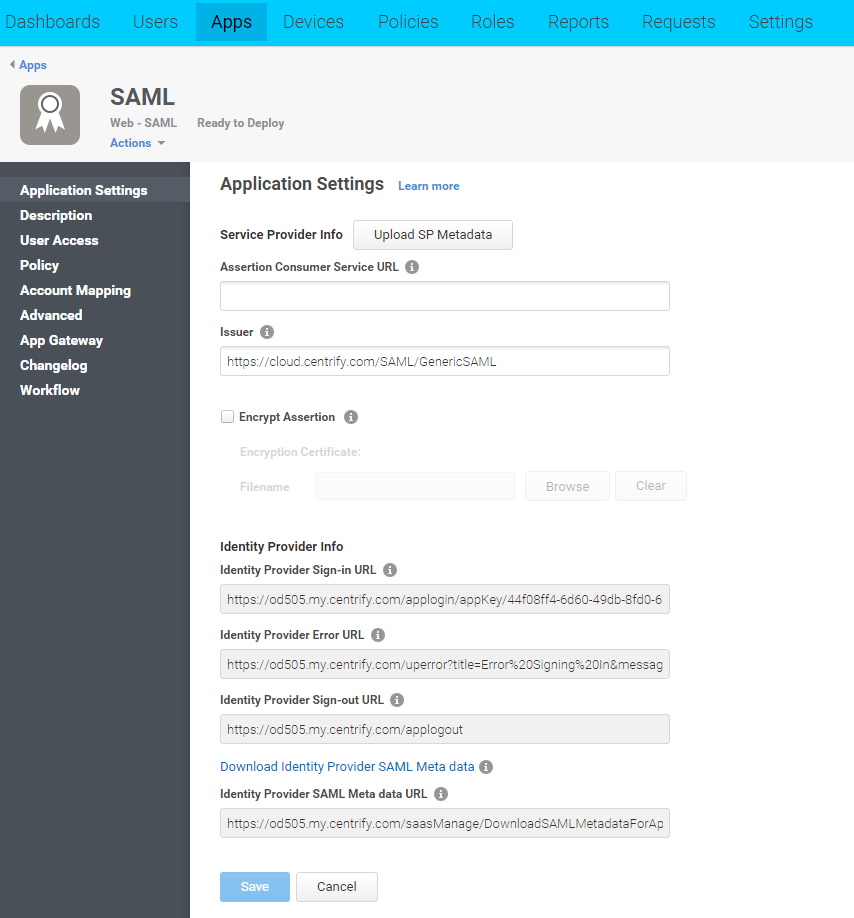
- Close any popup dialogs. After that you will be redirected to “Application Settings” page
- Go to *Elegant 6 -> Admin -> Sites and pick a site you want to enable SAML login for.
- Open SAML plugin configuration.

- Copy “Assertion Consumer Service URL” value from plugin configuration to corresponding SAML application field in Elegant 6.

- Copy “Issuer”, “Identity Provider Sign-in URL”, “Identity Provider Sign-out URL” and “Thumbprint” values from SAML application to corresponding plugin configuration fields in Elegant 6.

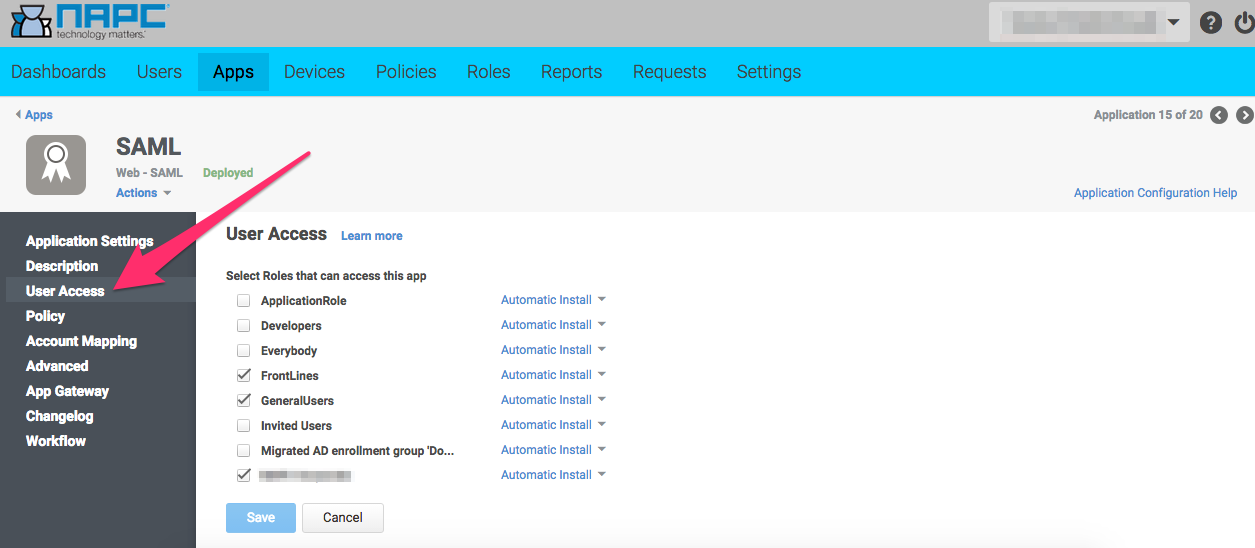
- Go to User Access tab and choose the groups which will have an access to the application.
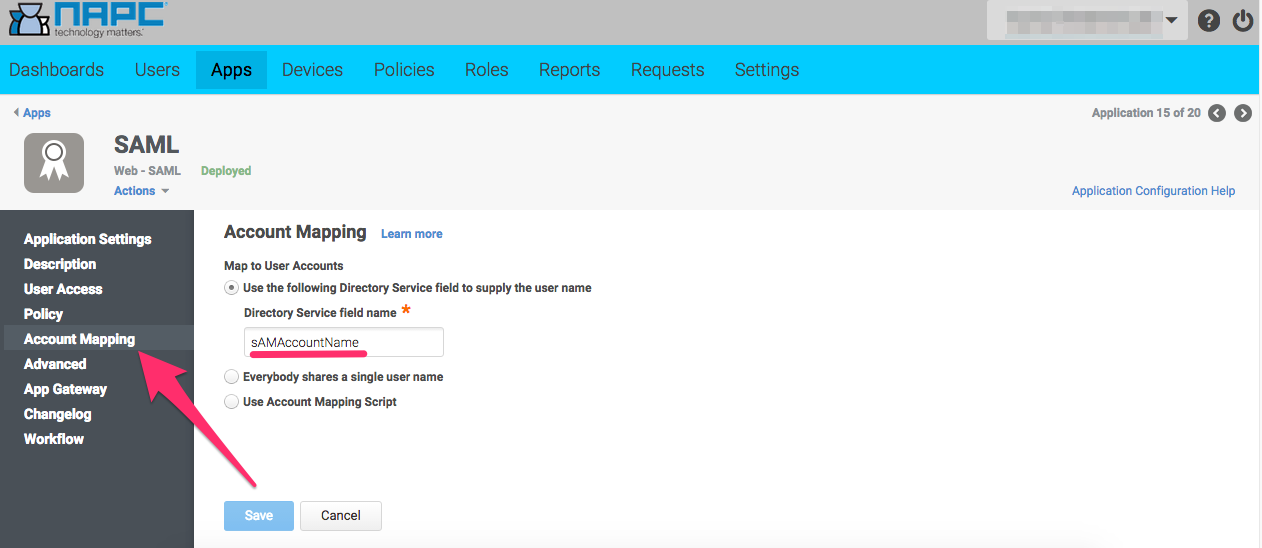
- Then go to Account Mapping tab and fill in the current field with the value:
sAMAccountName
- Go to “Advanced” SAML application settings

- Copy and paste the following data into script field:
setIssuer(Issuer);
setSubjectName(LoginUser.Username);
setAudience(ServiceUrl);
setRecipient(ServiceUrl);
setServiceUrl(ServiceUrl);
setHttpDestination(ServiceUrl);
setAttribute('uid', LoginUser.Username);
setSignatureType('Assertion');
- Don’t forget to save the changes
If all settings are met the Ready to deploy would be automatically transferred to Deployed.
Additional notes
Elegant 6 SAML plugin can work in two modes

- “As link” allows you to use SAML AND default login functionalities at the same time. In this case a button that allows to login using SAML will be added to login form.

NOTE in this mode “Logout” button logs you out of Elegant 6 only
- “Replace default login” – in this mode Elegant 6 login page will immediately redirect to SAML login screen.
NOTE: in this mode “Logout” button logs you out of Elegant 6 and Centrify
We also recommend to change default Simplesaml password here:
/var/www/html/elegant6/framework/simplesamlphp-sp-5-2/config/config.php (line 60):
'auth.adminpassword' => 'admin',
Note: replace “/var/www/html/elegant6” part if your Elegant 6 destination folder is different.
Go to the Next tab.