Installation of combined Elegant 6 / Supermail 2 package
Install from scratch.
-
To get the combined installer file:
wget ftp://ftp.napc.com/dist/napc/products/netinstaller.sh
 chmod 755 ./netinstaller.sh
 ./netinstaller.sh
Alternatives to the above commands (some folks limit ftp access outbound):
in lieu of "wget":
  curl -O ftp://ftp.napc.com/dist/napc/products/netinstaller.sh
or just ftp manually and GET the file (some folks don't have wget)
n lieu of "chmod 755":
  chmod +x ./netinstaller.sh
Combined Installer package will start automatically after choosing option 1.

Read step by step Installer instruction:
-
Before configuration:
Before launching Elegant 6 / Supermail 2 we need to prepare MySQL-Server:
Make sure you have a working MySQL server instance and that the root login for that server has a valid password and will accept the connection.
NOTE: It is strongly recommended to create your own unique password in terms of security.
For localhost connections (the MySQL instance lives on the same machine as Elegant 6 / Supermail 2 are installed). You can test it by using one of these commands from the command-line:
mysql -uroot -p
For remote MySQL instances (the server is on a different machine than the Elegant 6 / Supermail 2 are installed):
mysql -uroot -p --host=
Now, you can load Elegant 6 / Supermail 2 in your web browser and configure the DataBase settings.
-
Configuration
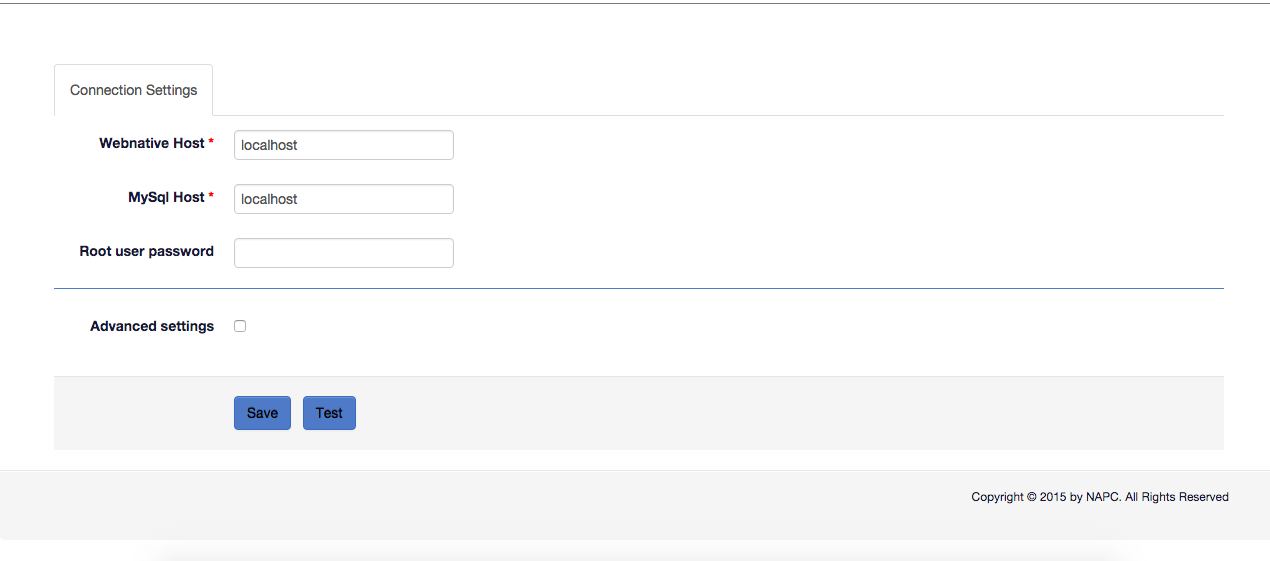
In the new Elegant 6 and Supermail 2, the connectivity settings for the root user are changed so the MySQL Database will be created automatically after using a "one-time" root user password.
These fields are required: "Webnative host", "MySQL Host" and "Root user password".
“Root user password” - Used once only to access Elegant 6 ans Supermail 2 database;
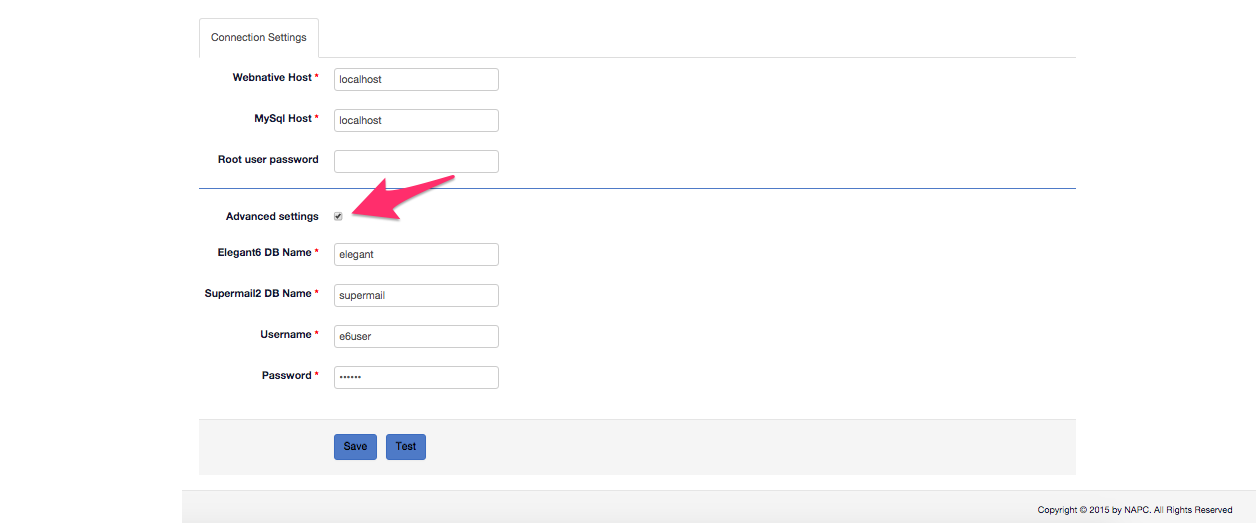
Checking the Advanced button, you will be able to configure Elegant 6 and Supermail 2 Databases. There are required fields to fill in: “Elegant6 DB Name”, “Supermail2 DB Name”, “Username” and “Password”. The default password is: e6user
-
Finishing installation
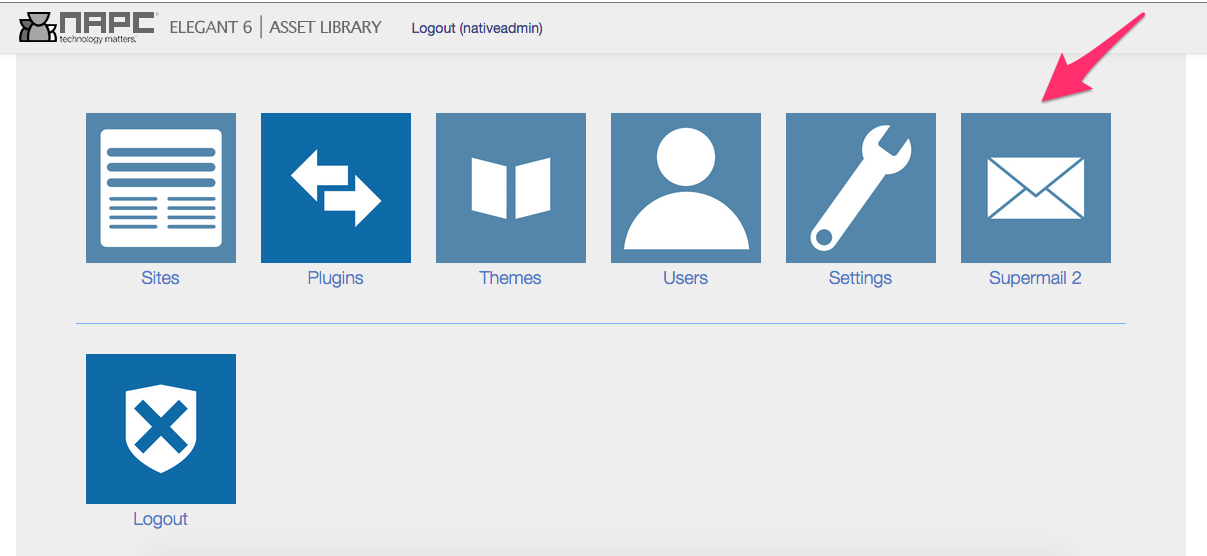
Click “test” to make sure your Database settings and WebNative settings are accurate. Now click “save” to write these settings into the application. After page reloading you will be able to log in as nativeadmin to create new Elegant 6 sites and configure Supermail 2 settings which are integrated in Elegant 6 admin menu.
Retrofitting an existing Elegant 6 and Supermail 2 into combined peckage
If you have standalone Elegant 6 and Supermail 2 installed on the same server and you want to turn them into combined package:
- Move your Supermail 2 application folder into Elegant 6 application folder
- Make sure that Supermail 2 application folder is called "supermail". As a result you will get the following path: /var/www/html/elegant6/supermail (example).
If you have Elegant 6 installed, but want to add Supermail 2 application to make it a combined package:
- Run installation as described above, using your current Elegant 6 application path. This will update your Elegant 6 and add Supermail2.
- Run installer again and perform "Configuration cleanup". Go to Elegant 6 url and finish configuration as described above.
Useful notes
- Built in Supermail works only with default webnative server, selected during application config.
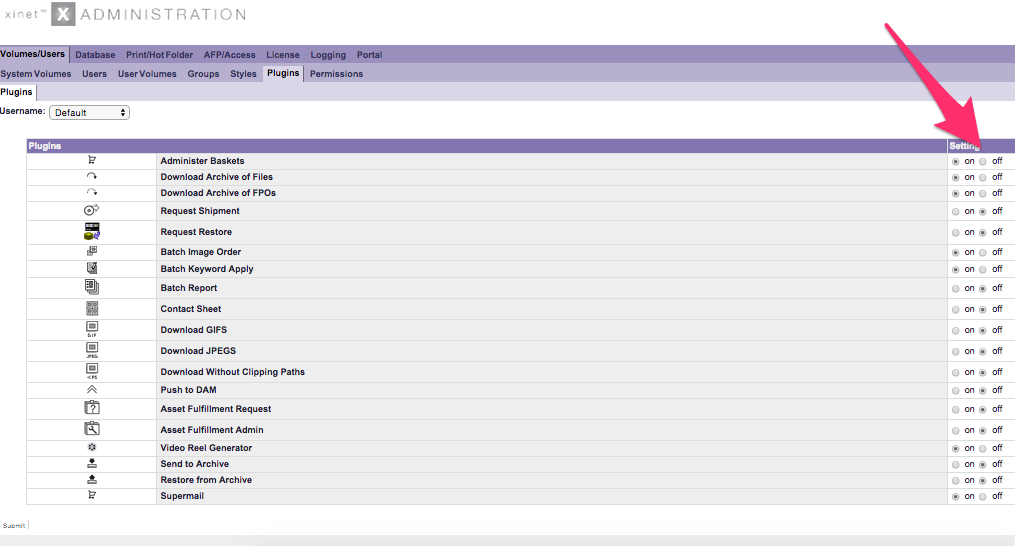
- If webnative server has previously installed "Supermail" webnative Basket plugin, disable it. Otherwise it will still be used instead of built in Supermail 2.
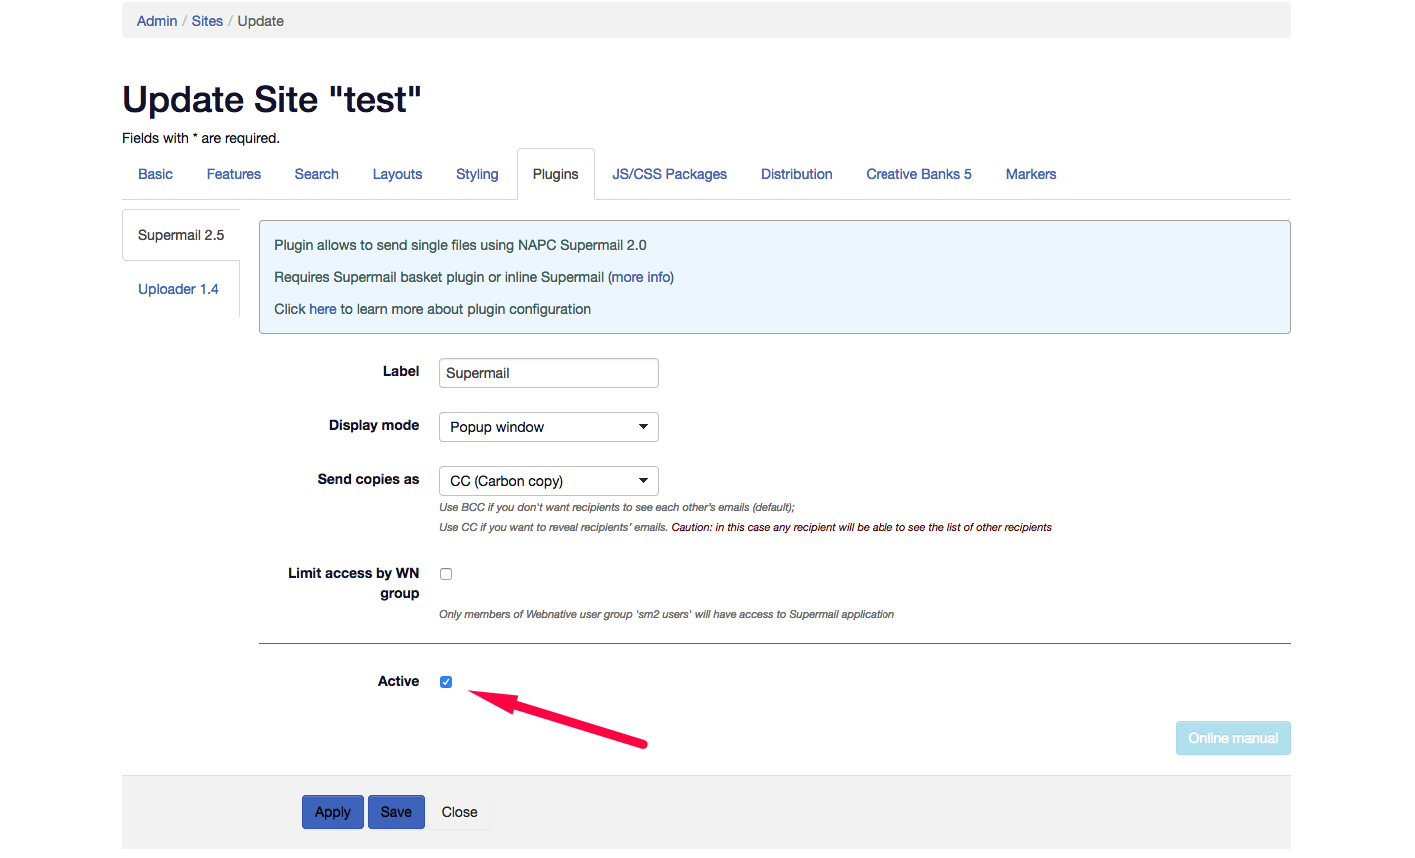
- If you need to disable inline Supermail 2 for a site, simply deactivate Supermail 2 plugin in E6->admin->site->plugins
- Built in Supermail 2 uses parent Elegant 6 license, so no additional licensing is required.
