Click the Templates button. You should see:
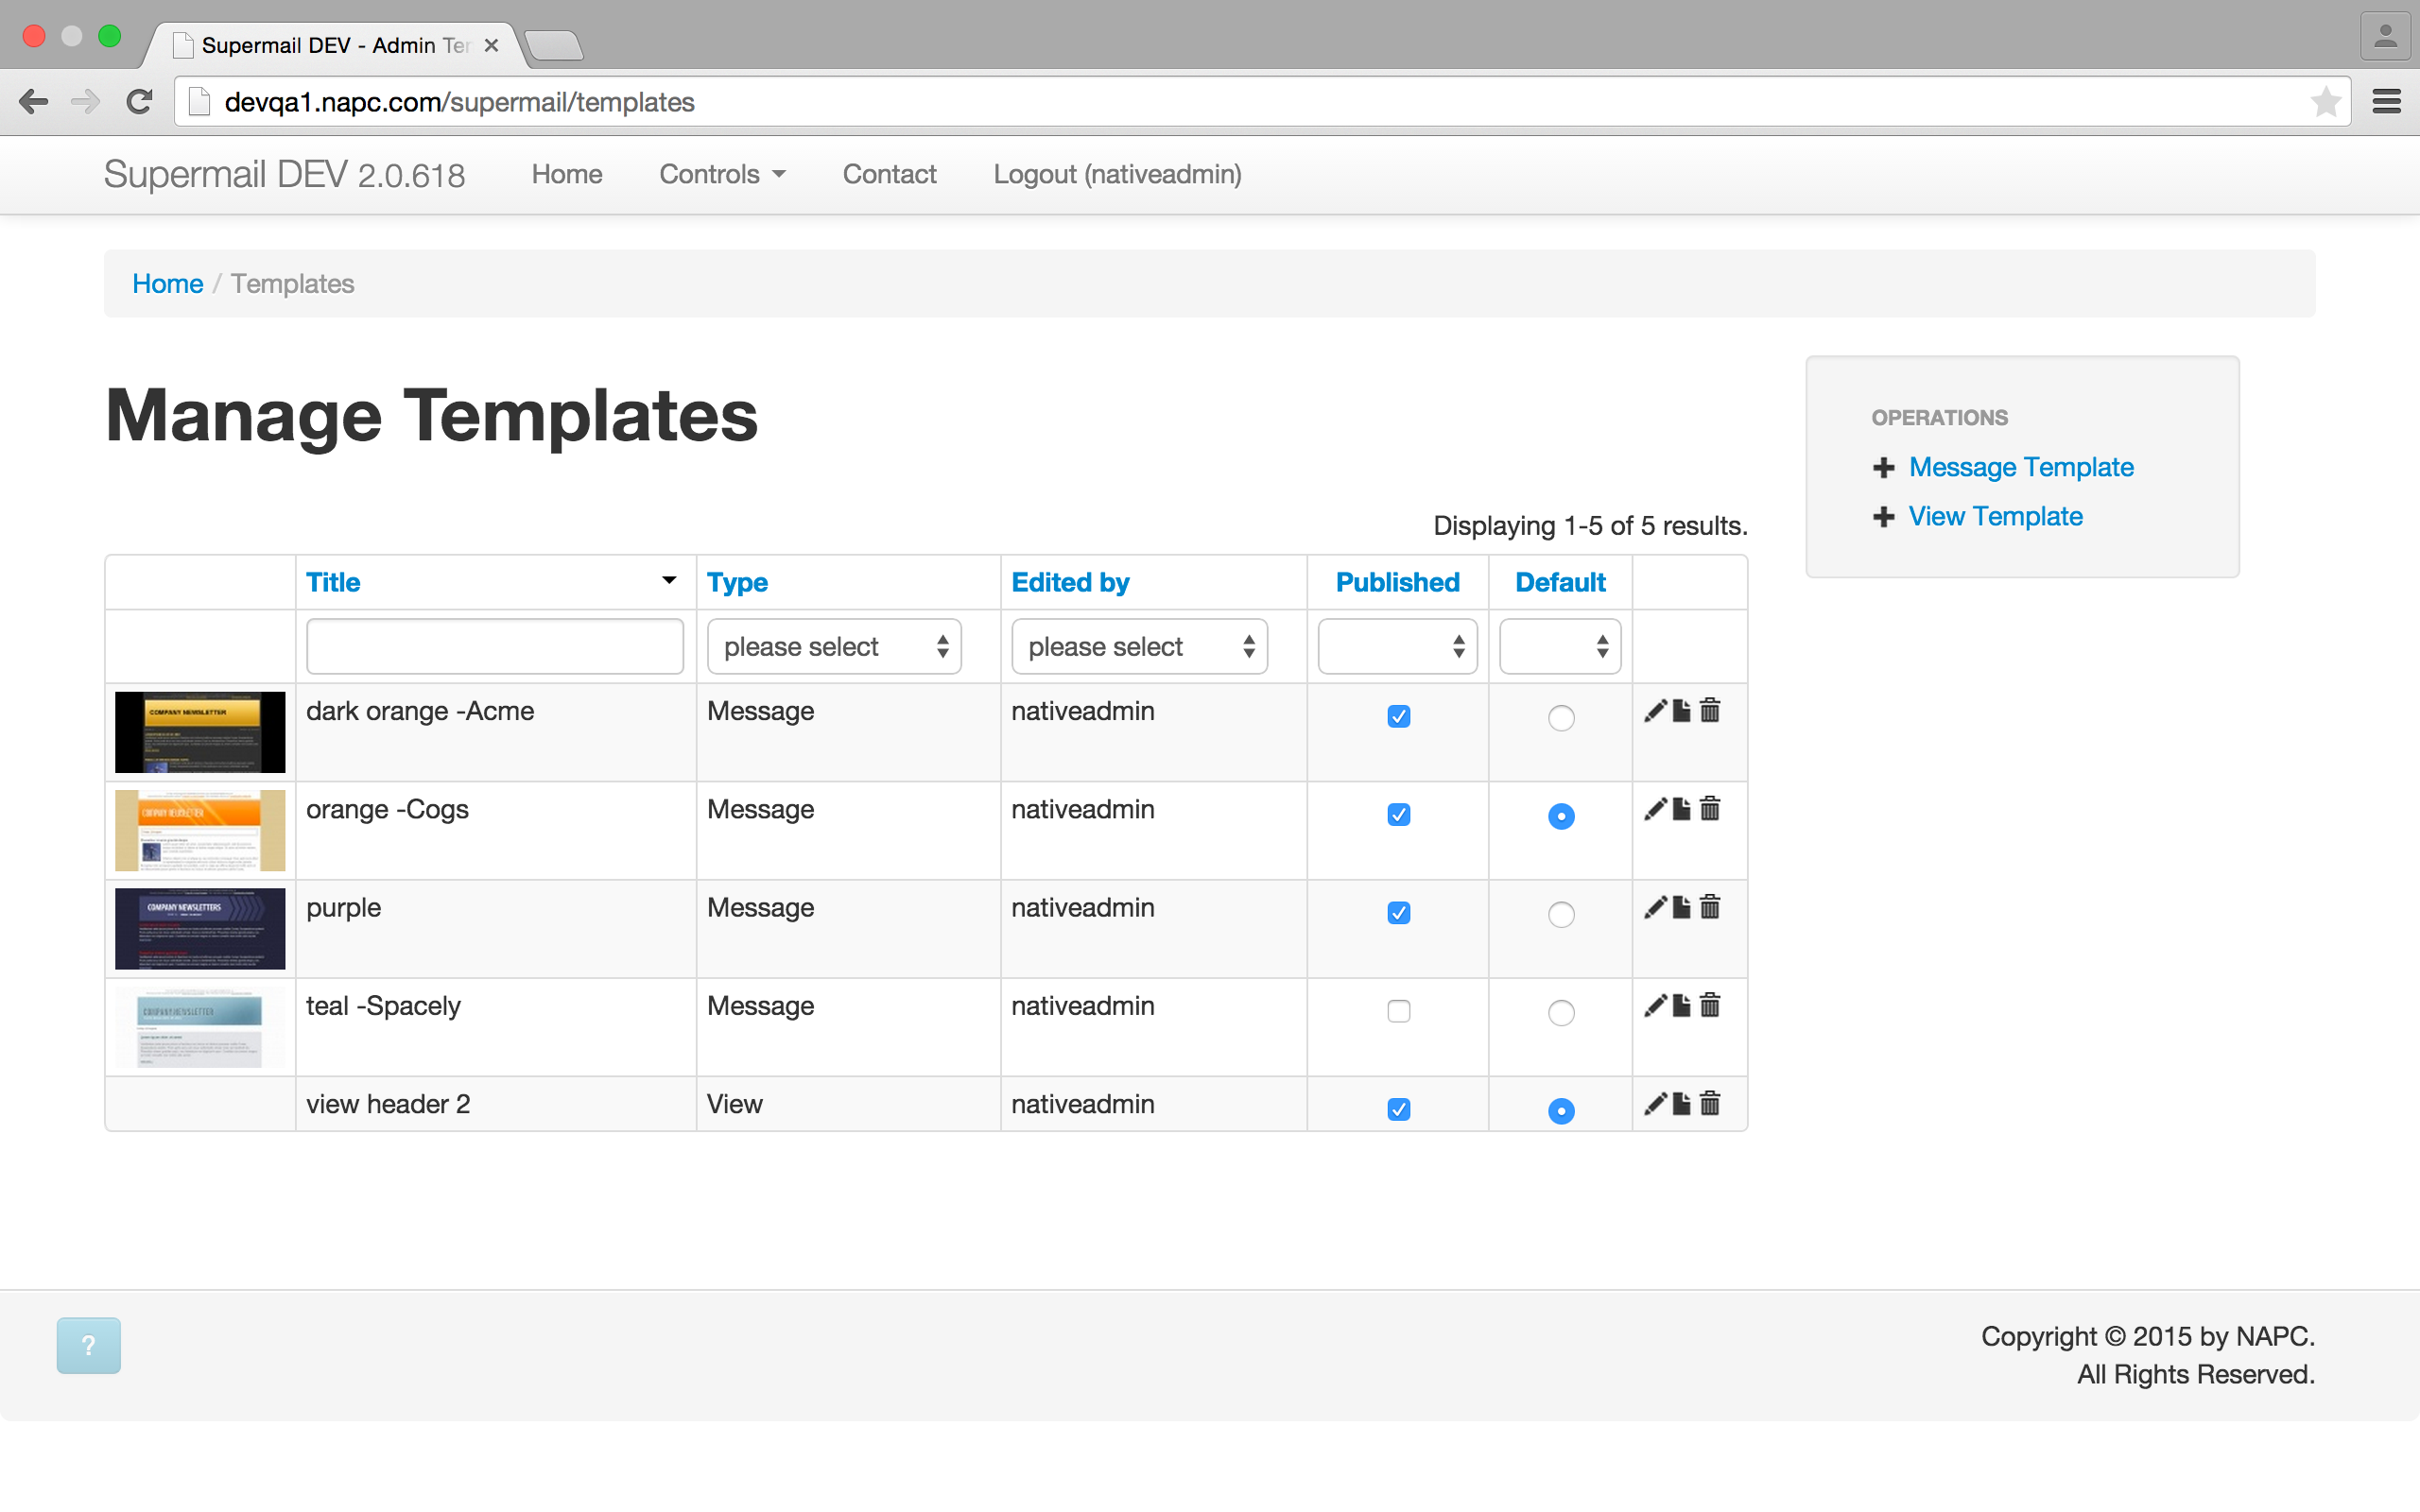
You'll see all the templates that have been created. You can make them Published (visible for all users) and Default (this template will be used by all users unless they go in to their own settings and select another one).
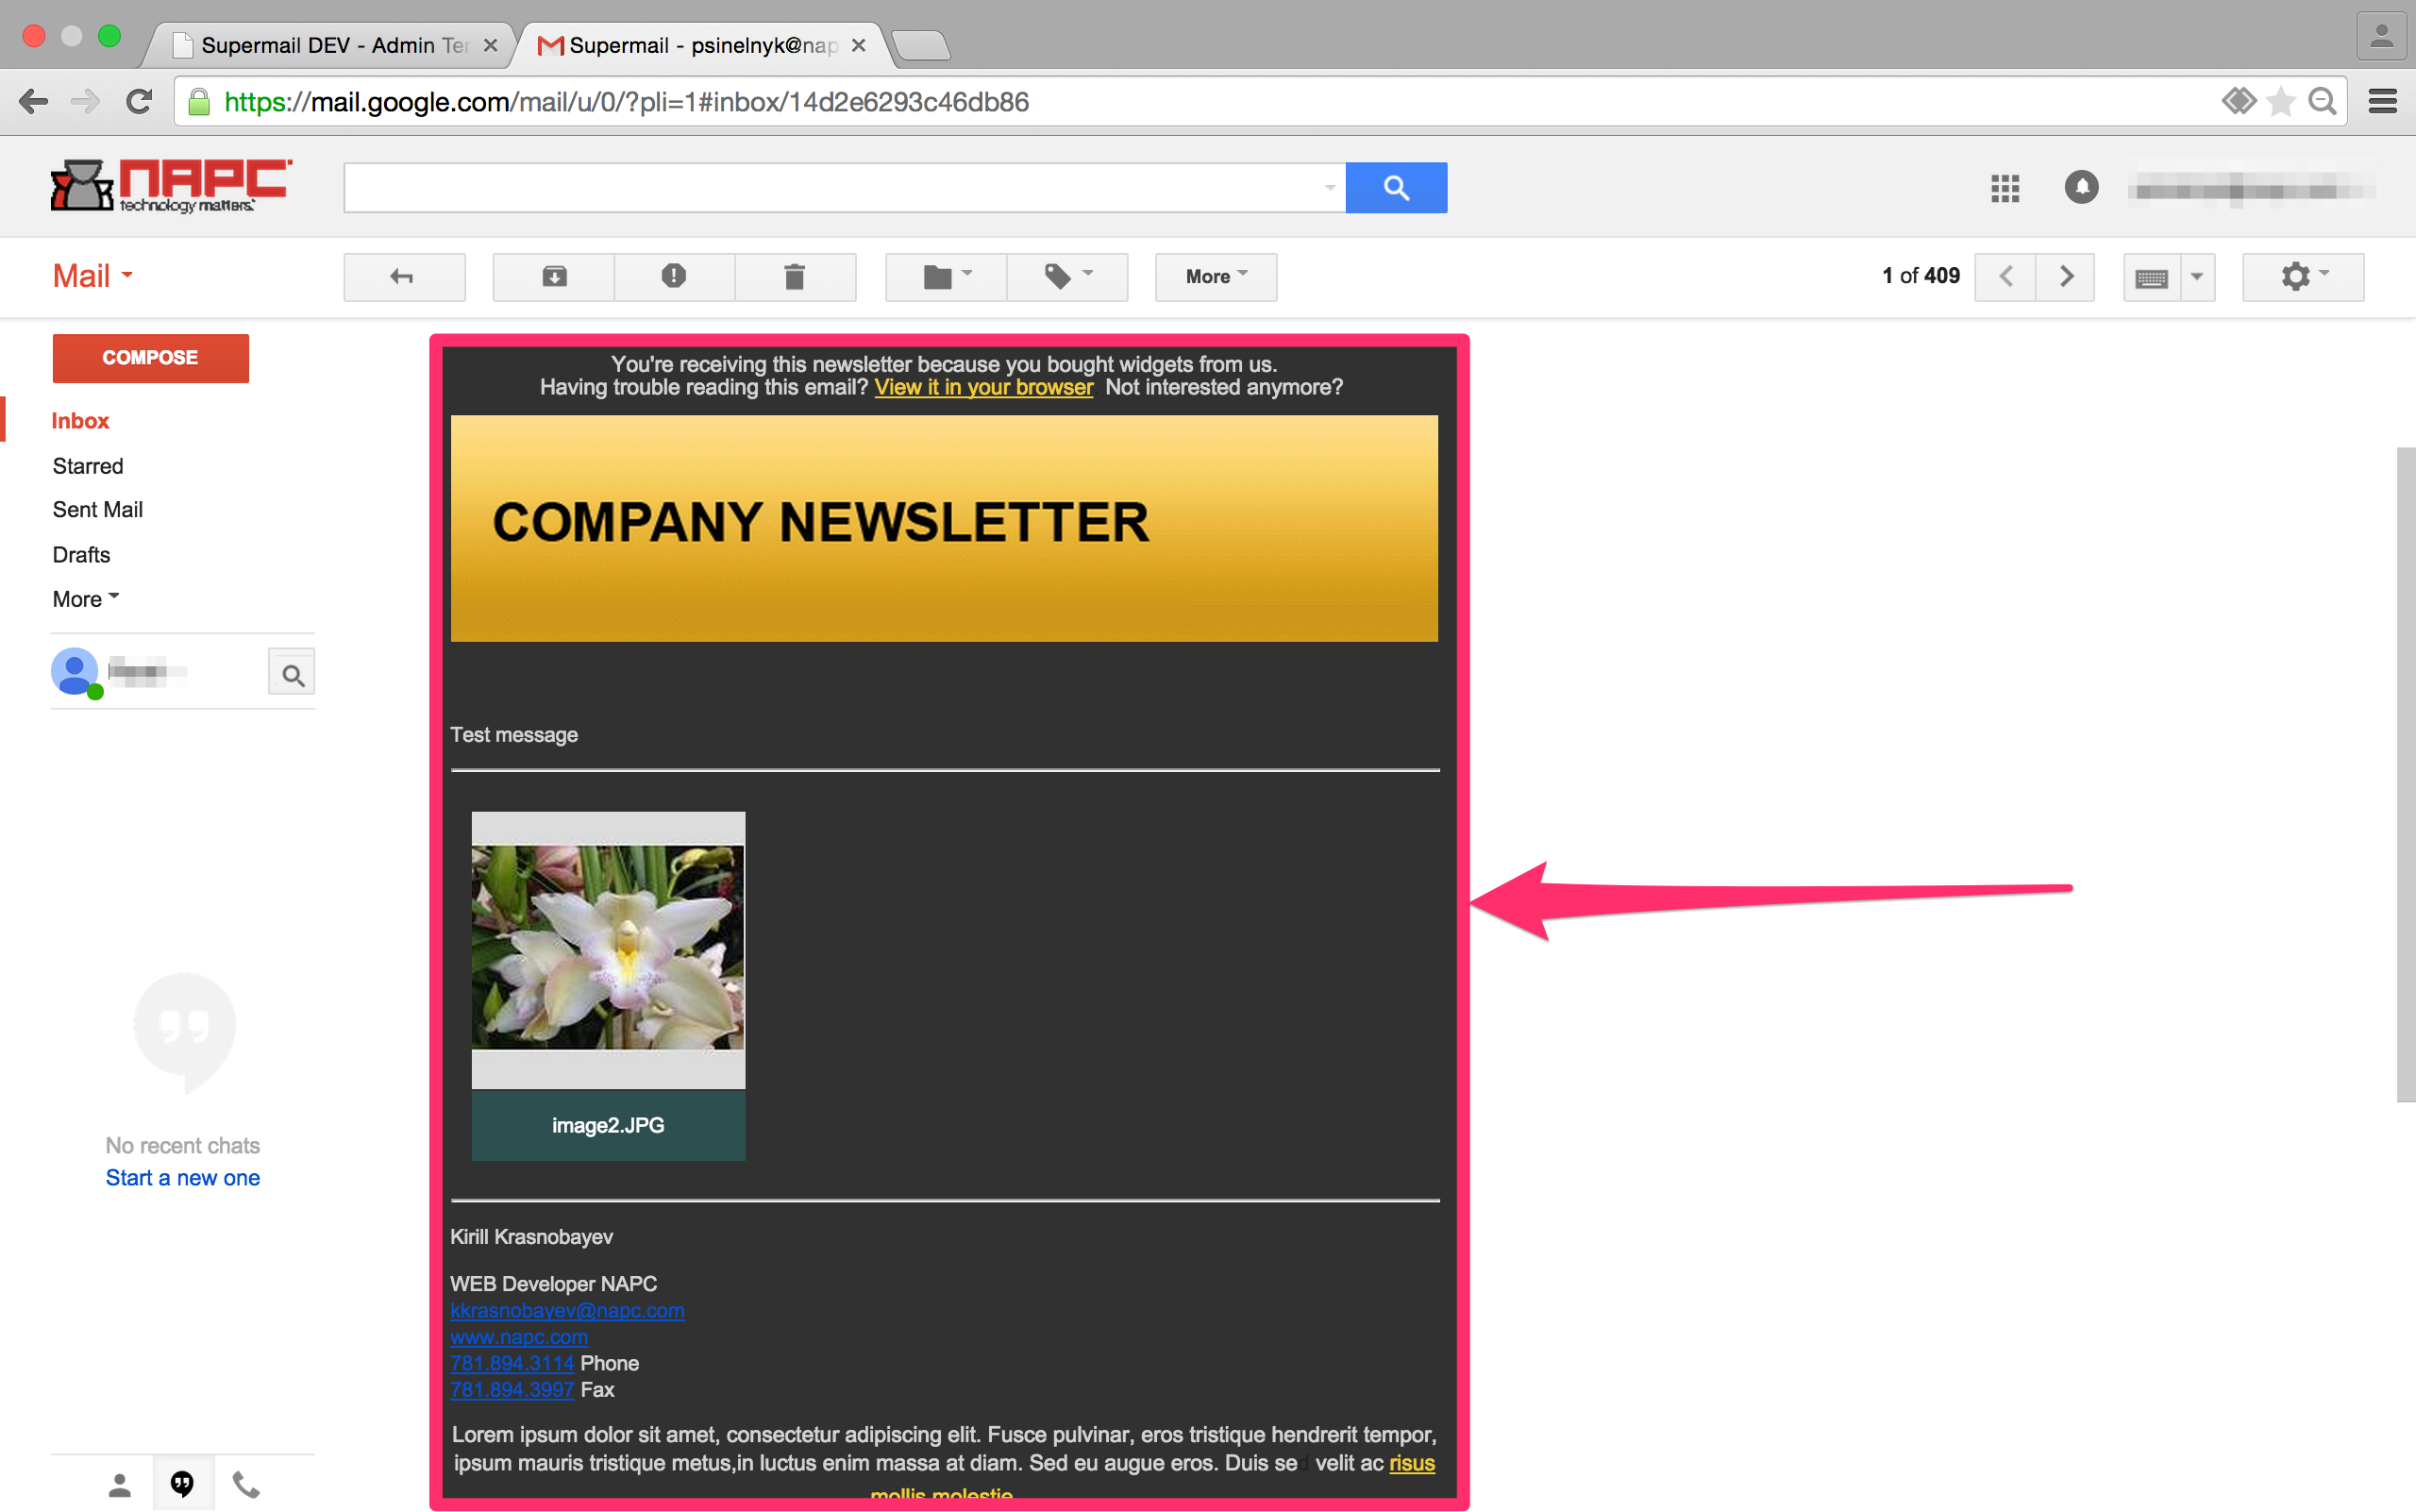
As you can see there are two types of templates: Message and View. Message template configures how your Supermail email will look:
The View template configures the files view page, how the files look in a browser:

You can Create a new template or Update an already existing one.

Under the Settings tab, you can define the following:
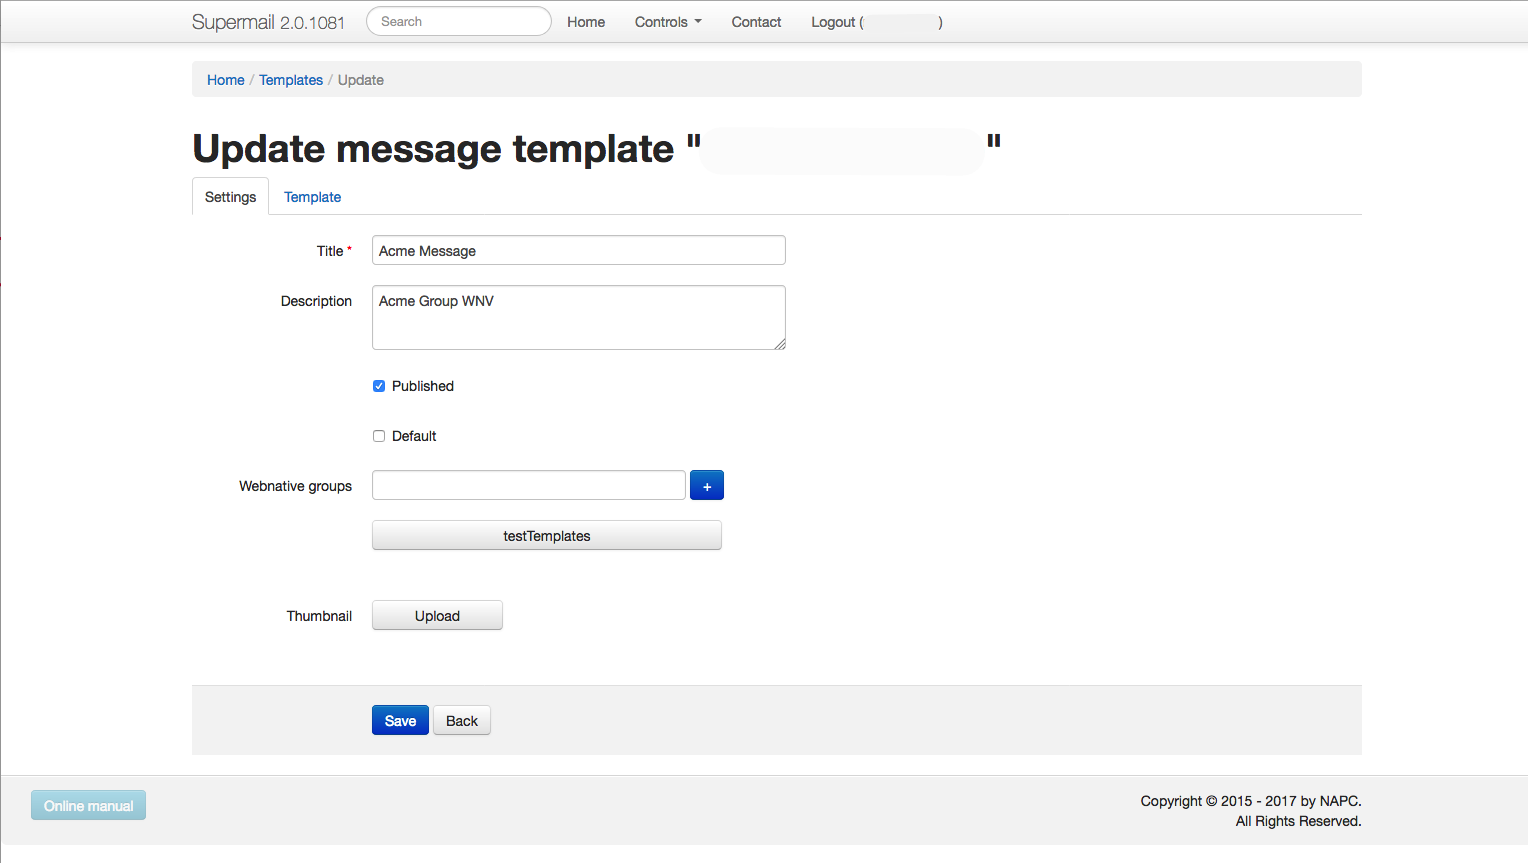
Title - This is the name of your template.
Description - This is a brief description of what your template is or does.
Published - This checkbox notifies the admin team that this template is ready to be used on live sites and can be seen by all users.
Default - This checkbox makes this template the default email style your Supermail recipients see.
Webnative groups -Choose webnative user groups that will have access to current template. If no groups are selected - template is accessible for all user groups
Thumbnail - A handy visual indicator, it's only visible when you select template from the list.
Once you've defined Settings, click the Template tab to set the following:
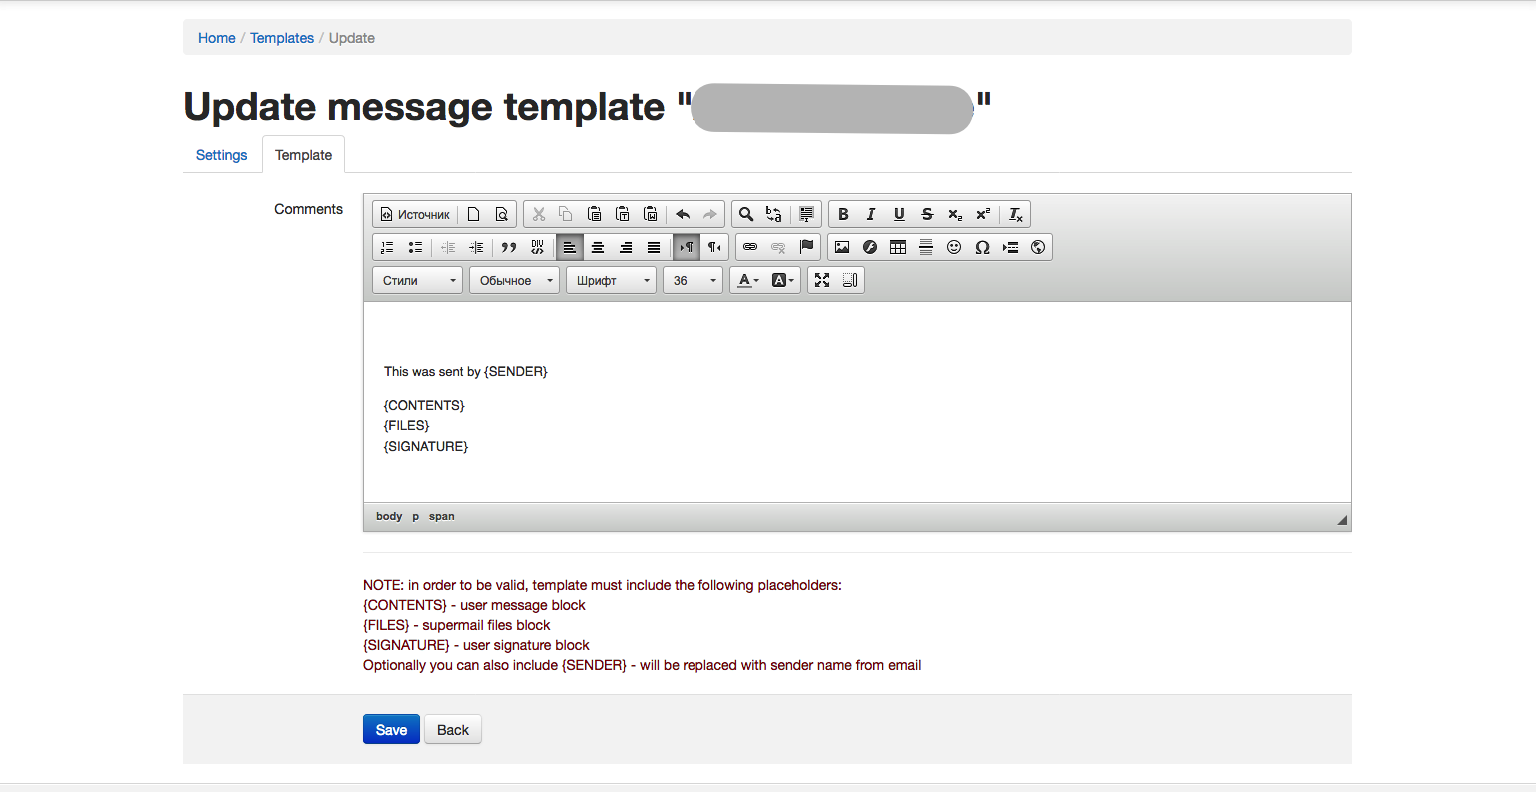
You have all the standard web design tools in the editor. If you are unsure of any what a button does, hover over with your mouse for an explanation. We've really tried to give tool tips wherever possible. Geeks- you can edit in HTML code form. Just press Source button. We won't tell. Well, we might.
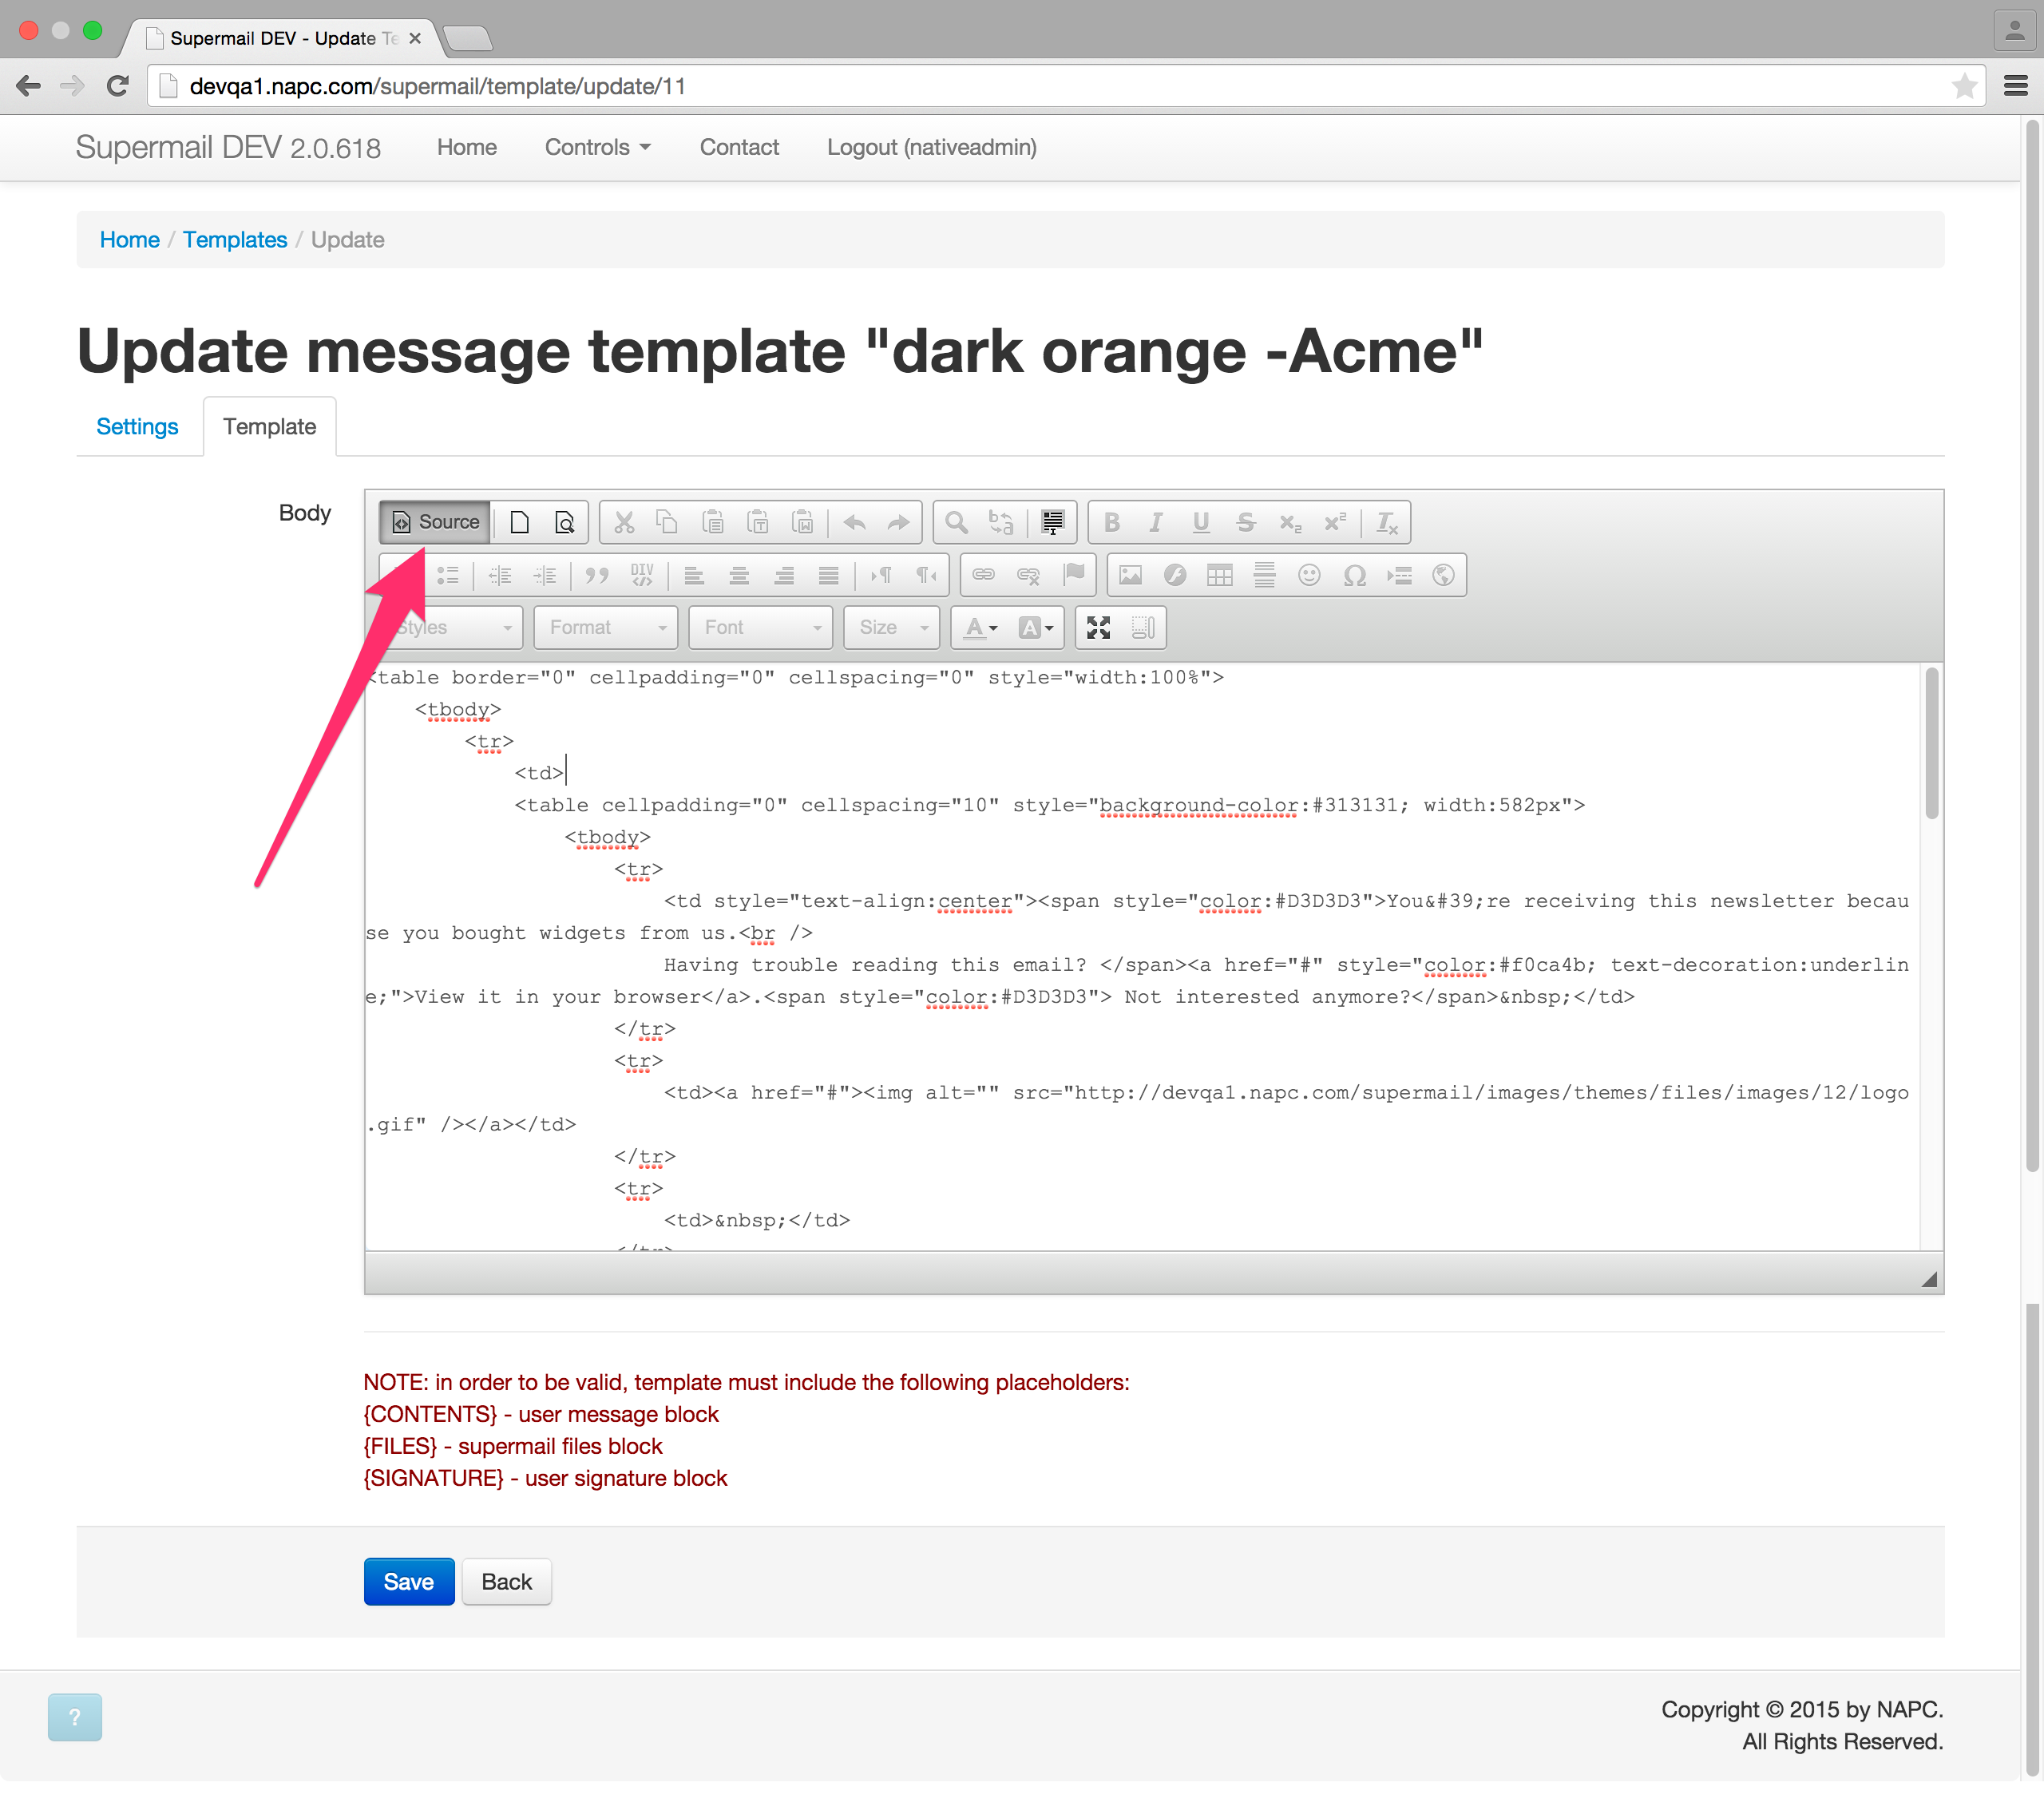
Pay attention, the Message template requires the following three placeholders to be valid: {CONTENTS}, {FILES} and {SIGNATURE} .
Once you are done, click “Save”.