The Sites tab is where you can create and customize your client entry portals. Under the Actions tab in the top toolbar are options to Add or Import sites. On the far right is a Pencil icon to edit an existing site and the curved Arrow is an export option. Export creates a zip file ( ezx_<version>_<SiteName> ) and that is used with ‘Import Site’. When you Import a site zip file, the new site is named after the original with underscore Imported, so it’s unique. This is an easy way to start with the majority of information and settings preset. Just rename it and customize as needed. This is also very useful if you have additional Xinet servers at Sister colocations.
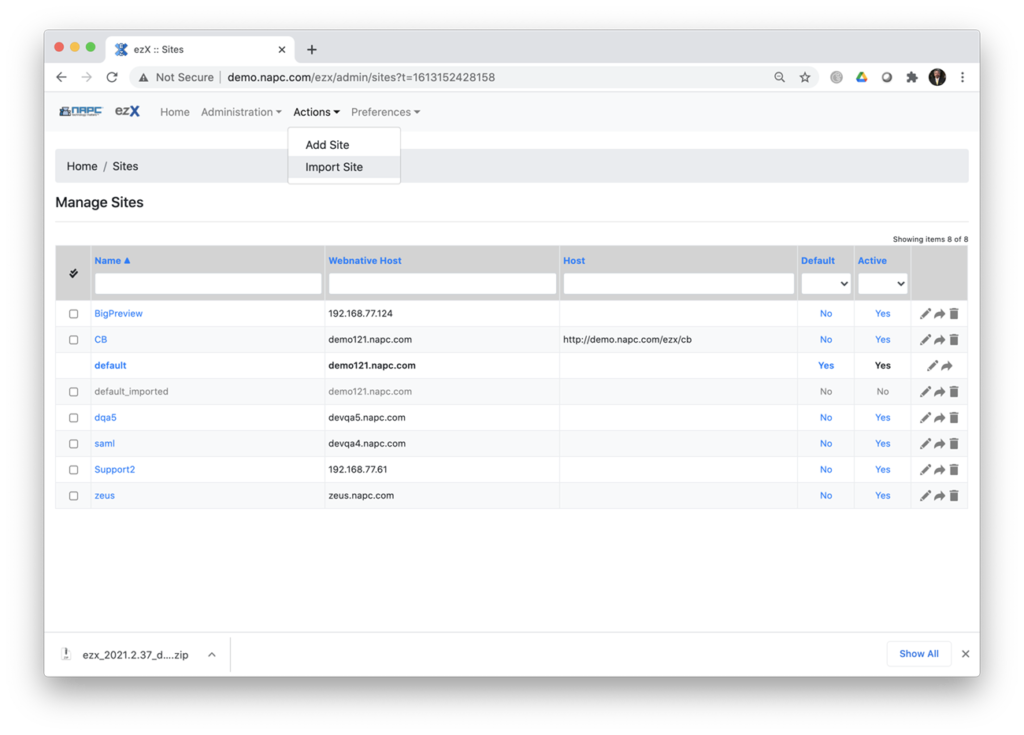
In my screen shot above (Site Tab) I exported my Site named ‘default’ and you see the zip file downloaded and I used that to Import Site (default_imported) for this manual.
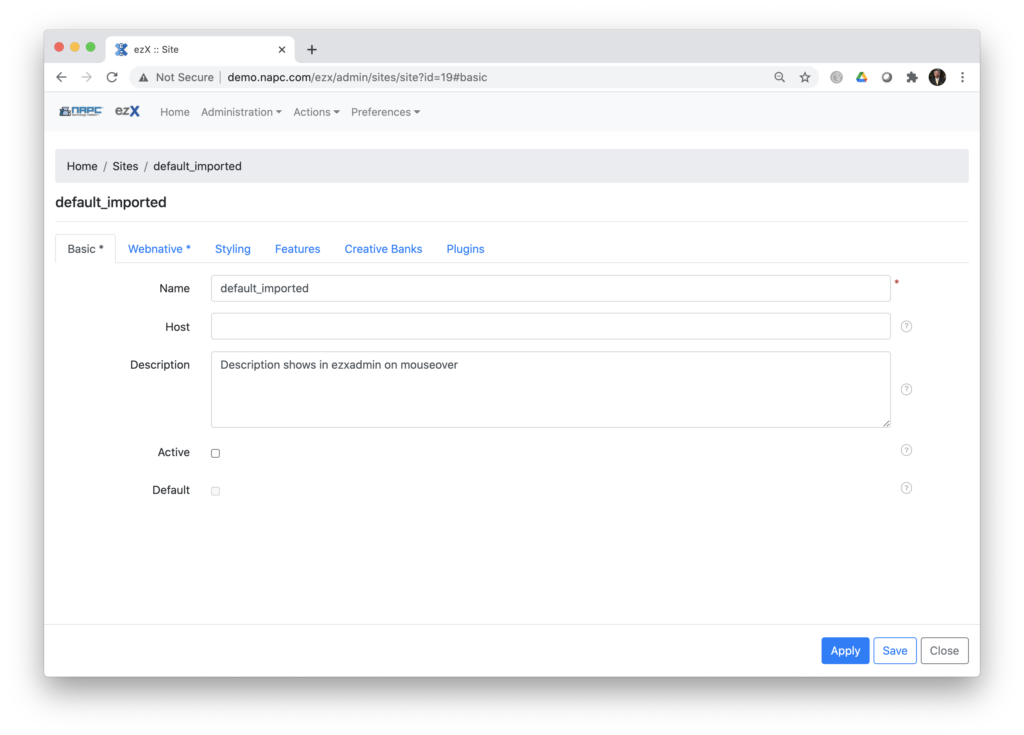
When we import a site, all of the original site settings are preset, so we need to Name the site and Activate it. You can walk through all of the tabs and customize accordingly and Save at the end. Or you could Apply changes as you go through each tabbed section. The difference is, Apply will apply the changes and leave you within that same edit window to continue, where Save will also apply changes but navigate you back out to main Sites Tab.
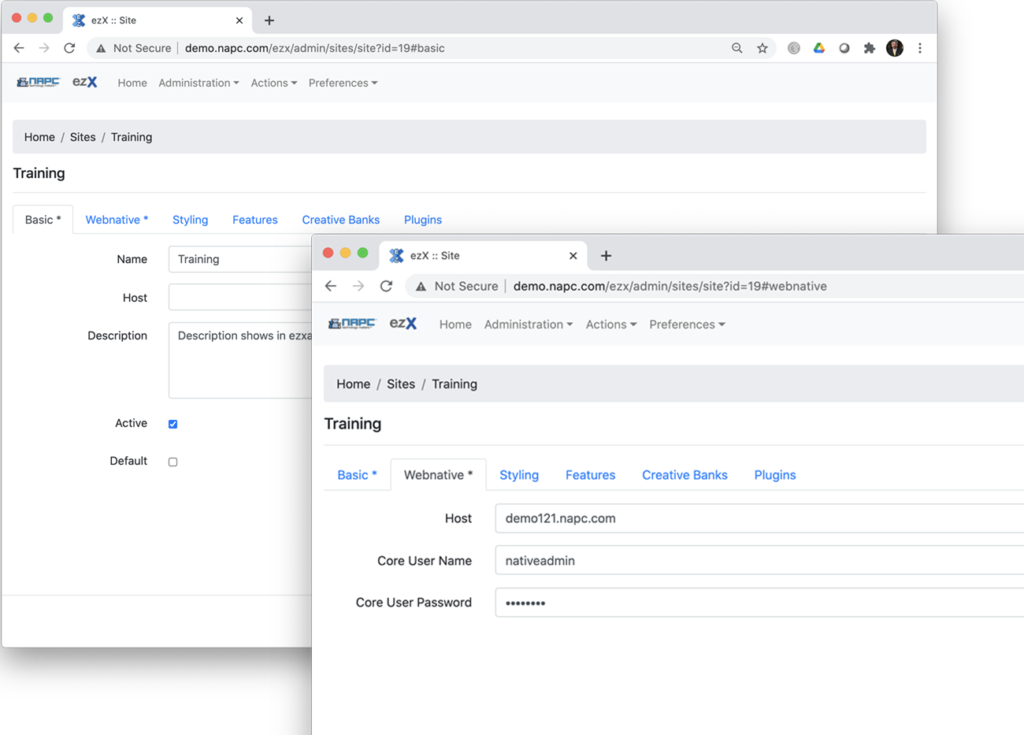
Now I’ve renamed my Imported Site as Training, Activated it, Applied it and moved on to the Webnative Tab. Here you need to set the Webnative Host server by DNS name or IP address. We don’t need the html prefix but you’ll enter the Core User Name of nativeadmin and the password.
( separate pages for the next four sub tabs )


